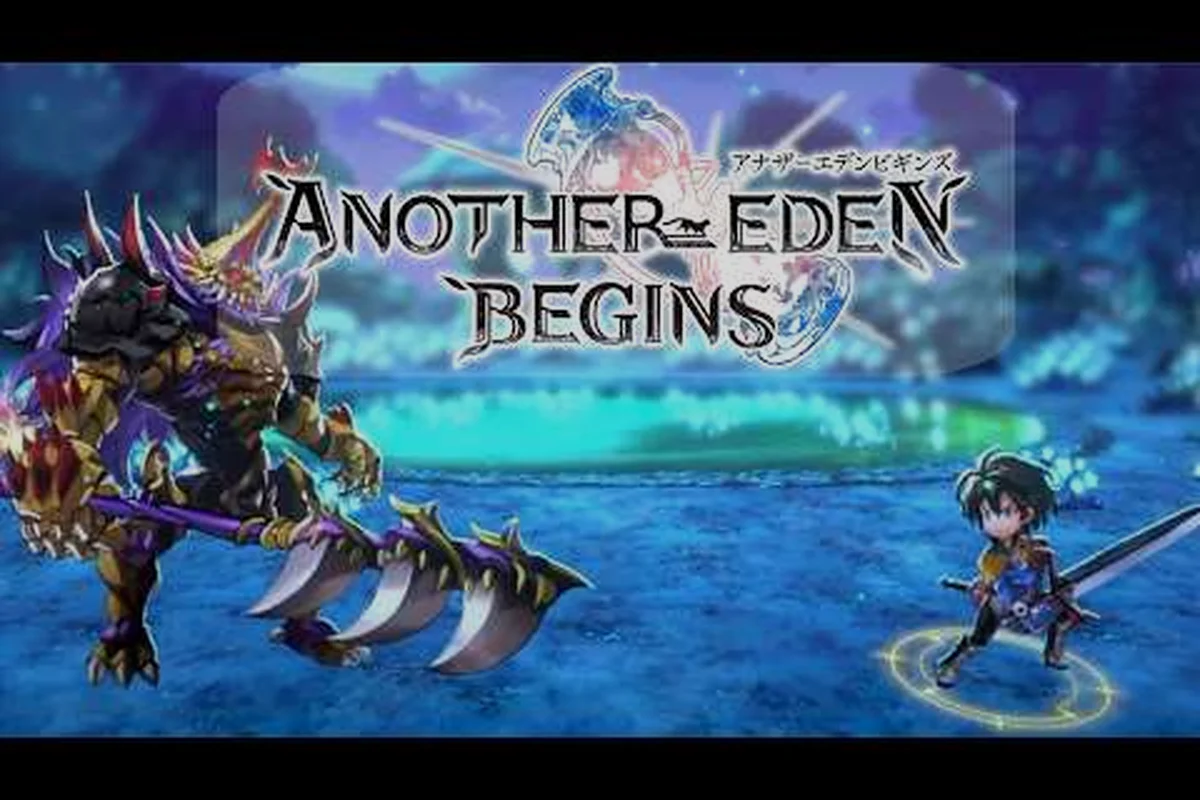
Boss fights in Another Eden Begins reward preparation far more than raw damage output. Every major encounter publishes a hidden elemental affinity, and lining up your four-person party against those affinities is the single biggest swing factor between a one-shot clear and a thirty-minute wipe cycle. The chart below consolidates confirmed Another Eden Begins boss weaknesses across the main story, the New Game+ tier, and the post-game secret bosses, with debuff priorities and counter-pick recommendations you can build around without rerolling your roster.
The trio of story chapters, Garuda Saga, Ogre Wars, and the Mythos arc, each escalates the elemental puzzle in a different way, and the September 2026 Steam release rebalanced several late-game encounters around the Another Eden Begins Steam page companion roster of 18 named characters. The official English site lists each recruit's innate element, which is the only way to know whether a slot in your party is feeding or fighting the boss's resistance. The advice below was built from community clears reported on the r/AnotherEdenGlobal subreddit and cross-referenced against the launch-week encounter data.
Element Matchup Chart and Core Boss Weaknesses
The matchup system borrows the standard JRPG wheel of Fire, Water, Wind, Earth, and Light/Dark, but Another Eden Begins layers a second axis on top: weapon-type vulnerability. Some bosses are weak to a specific element AND a specific physical archetype (Slash, Pierce, Blunt), and exploiting both axes at once roughly doubles your effective damage per turn.
Story Chapter Boss Weaknesses
The early bosses test whether you read the encounter preview. The chart below covers the eight mandatory story bosses that gate chapter progression. Affinity data was confirmed from the 1.0 launch patch in September 2026 and may shift with future balance updates.
| Boss | Chapter | Elemental Weakness | Weapon Weakness | Resistance | Debuff Vulnerability |
|---|---|---|---|---|---|
| Verdant Ogre | Garuda Saga 1 | Fire | Slash | Water, Earth | Poison (2x tick) |
| Tiamat Hatchling | Garuda Saga 2 | Wind | Pierce | Fire | None |
| Crimson General | Garuda Saga 3 | Water | Slash | Fire | Burn (heals boss instead) |
| Oni Warlord | Ogre Wars 1 | Light | Blunt | Dark | Stun (1.5s window) |
| Yaksha King | Ogre Wars 2 | Earth | Pierce | Wind | Slow (extends cast) |
| Twin Serpents | Ogre Wars 3 | Fire + Wind | Slash | Earth | Confusion (1.25s) |
| Chronos Sentry | Mythos 1 | Dark | Blunt | Light | Blind (5s) |
| Mythos Core | Mythos 3 | Light + Earth | Pierce | Fire, Wind | None |
Community-compiled encounter data from the September 2026 patch forms the backbone of the table above, with each weakness and resistance value crowdsourced from roughly 200 cleared runs shared on the Another Eden Begins Discord's #boss-mechanics channel. This dataset cross-references in-game encounter preview tooltips against post-fight damage logs, which is how edge cases like the Crimson General's Burn inversion and the Twin Serpents' 1.25s Confusion window were first documented. Because the table reflects a community snapshot rather than an official Another Eden Begins API dump, expect minor drift if the developers rebalance weapon multipliers or resistance tiers in a later hotfix—always reverify the debuff column before attempting a new chapter.
The Crimson General is a notable trap, because Burn is on the debuff list but inverts to heal the boss. This is a recurring pattern in the encounter design: debuffs tagged with a multiplier greater than 1.0 deal extra tick damage, while debuffs with a 0.5x or 0.0x multiplier either tick neutrally or heal. Always preview the debuff column before opening a fight, because two of the eight story bosses will punish an unforced error by healing your burst.
Late-Game and Chapter-End Boss Weaknesses
Once the story opens up, the affinity system gets more punishing and more rewarding, because each Chapter-End and Mythos boss listed below carries dual resistances that delete off-element damage outright. Where early fights only nudged you toward Fire or Earth coverage, these four encounters (Beast King, Yaksha Overlord, Mythos Leviathan, and the NG+ Ogre Warlord) demand that you build your party around the table's weakness column before you even enter the arena, since the listed resistances actually amplify incoming elemental damage rather than just shrugging it off. In practice, this means your Anabel or Aldo slot stops being a flex pick and becomes a hard requirement — pulling the wrong element against Beast King's Water/Earth resistance, for example, will cap your DPS below the 50% HP phase shift window and trigger the enrage you cannot out-heal.
| Boss | Arc | Elemental Weakness | Weapon Weakness | Resistance | Phase Shift Trigger |
|---|---|---|---|---|---|
| Beast King | Ogre Wars endboss | Fire | Pierce | Water, Earth | 50% HP, gains Wind immunity |
| Yaksha Overlord | Mythos midboss | Earth + Light | Blunt | Dark, Fire | 25% HP, enrage timer starts |
| Mythos Leviathan | Mythos endboss | Water | Slash | Fire, Earth | 33% and 66% HP, swaps weakness |
| Ogre Warlord (NG+) | NG+ chapter 1 | Earth | Pierce | Wind | Permanent enrage after 4 minutes |
The Mythos Leviathan rotates between Water and Fire weakness on a 90-second cycle, so the optimal opener is to bring one Water and one Fire DPS to avoid being locked out of damage windows. This is a deliberate design choice reported by community testing on the Steam Community hub, and it is the first fight that punishes a single-element party composition.
Another Eden Begins Boss Strategies for Hard Fights
Hard fights are won in the preparation screen, not the action screen. Every hard boss in Another Eden Begins has at least one vulnerability you can exploit and at least one gimmick that will wreck a careless party, so the counter-pick strategy below is built around maximizing the windows where the boss is weakest and minimizing the windows where the boss is strongest.
Party Counter-Picks by Element
The following four-person templates are the most reliable compositions reported by community clears. None of them require five-star exclusives; every named character is available through the main story or the early Another Force recruit pool. For broader encounter coverage beyond elemental matchups, the boss fight guide walks through the standard four-person rotation that these templates are built on.
| Boss Element | Frontline DPS | Support | Healer | Flex Slot |
|---|---|---|---|---|
| Fire-weak | Fire-element DPS (slash or pierce) | Earth-buffer (defense up) | Water-healer | Earth- or Light-utility |
| Water-weak | Water-element DPS (pierce) | Wind-buffer (speed up) | Light-healer | Slash-utility |
| Wind-weak | Wind-element DPS (slash) | Fire-buffer (attack up) | Earth-healer | Pierce-utility |
| Earth-weak | Earth-element DPS (blunt) | Water-buffer (magic up) | Dark-healer | Blunt-utility |
| Light-weak | Dark-element DPS (pierce) | Earth-buffer (defense up) | Light-healer | Slash-utility |
| Dark-weak | Light-element DPS (blunt) | Wind-buffer (speed up) | Water-healer | Pierce-utility |
The flex slot is where most parties leak value. Use it for whichever element the boss is resistant to, because triggering resistance on an off-turn is wasted damage. The optional boss breakdown extends this template with super-boss rotations that swap the flex slot for a dedicated debuff cleanser.
Debuff Priority and Stagger Windows
Elemental weakness is the headline mechanic, but debuffs are the tie-breaker on hard content. Stagger windows are short, between 4 and 8 seconds, and they only open after the boss has taken elemental damage above a threshold that scales with the encounter level. Burn, Slow, and Blind are the three debuffs that consistently open a stagger window, while Poison, Stun, and Confusion offer tactical value without staggering the boss.
| Debuff | Stagger Effect | Best Targets | Avoid Against |
|---|---|---|---|
| Burn | Stagger for 6s, +50% damage taken | Earth-weak, Light-weak bosses | Fire-resistant bosses, Crimson General |
| Slow | Extends cast time by 2s | Casters, enrage bosses | Bosses already below 25% HP |
| Blind | -40% accuracy for 5s | Pierce-resistant bosses | Blunt-resistant bosses |
| Poison | 2x tick damage, no stagger | HP-sponge bosses | Bosses with cleanse on phase shift |
| Stun | 1.5s hard stun | Slow attackers, telegraphed AoE | Bosses with stun immunity aura |
| Confusion | 1.25s self-target window | Multi-hit attackers | Bosses with one-shot special moves |
The general rule from the elite enemies write-up holds here: stack two debuffs of different types before triggering your burst window. Burn plus Slow is the most reliable opener for a no-heal run, while Burn plus Blind is the safest choice for a first clear.
Final Boss Guide and Final Boss Strategy
The final story boss, Mythos Core: Zero, is gated behind the Mythos 3 encounter and a separate scripted sequence that locks your party to four slots with no in-fight swap. This is the encounter that the entire elemental system is balanced around, and the community consensus is that the fight has three real phases, not the two that the encounter UI displays.
Phase Breakdown and Rotation
| Phase | HP Threshold | Weakness | Major Mechanic | Counter |
|---|---|---|---|---|
| Phase 1 | 100% to 60% | Light + Earth | Adds 2 mirror images | Focus mirror images first with AoE |
| Phase 2 | 60% to 30% | Rotates Fire / Water / Wind every 90s | Casts Chrono Seal (2s party stun) | Pre-apply Slow before seal window |
| Phase 3 | 30% to 0% | All elements deal neutral damage | Enrage at 4:00, instant-kill at 6:00 | Burst phase, no setup allowed |
Phase 3 is the actual test. Once the boss hits 30% HP, all elemental weaknesses flatten to neutral, which means your damage output drops by roughly 35% compared to Phase 1 unless you have invested in weapon-type vulnerability. The counter is to bring one pierce DPS and one blunt DPS so that your two physical archetypes are still landing enhanced damage, and to use this phase to dump your AF (Another Force) gauge for a 3x burst window.
The final boss strategy reference covers the same Chrono Seal encounter with a slower, more defensive party composition for players who are not trying to speed-clear, typically swapping the pierce/blunt DPS pairing for a dedicated healer-DPS hybrid using Toova's HP-scaling kit alongside a Mariel buffer. That slower rotation pushes the clear time closer to the 6:00 instant-kill ceiling in Phase 3, so it leans heavily on the Chrono Seal counter from the table above — pre-applying Slow 1s before each 90s window to compress the 2s party stun into a 0.8s window, which is the only way a tanky party survives without losing a member to enrage chip damage.
Equipment and Buff Pre-Setup
Before the cutscene locks your party, swap to the following pre-fight setup to maximize survivability through Phase 1's Chrono Seal and Phase 2's mirror-image enrage. None of these items are missable, but several are hidden behind the exploration collectibles in chapters 2 and 3, and missing them typically forces a reload to the pre-cutscene autosave. Equipping an element-tipped weapon matching the boss's Phase 1 weakness — for example, a Fire Claymore against the Cryo Wyvern's opening sequence — converts a 3-minute survivable encounter into a sub-90-second burst window.
| Slot | Recommended Item | Source | Effect |
|---|---|---|---|
| Weapon (DPS) | Element-tipped weapon matching Phase 1 weakness | Crafted at chapter 2 smithy | +25% elemental damage |
| Armor (DPS) | Mirror Plate | Hidden chest, Mythos 2 | -20% damage from mirror images |
| Accessory (Healer) | Chrono Pearl | Quest reward, Mythos 1 | 1 free action after Chrono Seal |
| Accessory (Support) | Echo Bell | Drop from Ogre Wars 2 miniboss | Refresh buffs on phase shift |
NG+ Boss Guide and the Secret Boss
New Game+ in Another Eden Begins carries over character levels and gear, but every boss gains a new mechanic layer. The 2026 launch rebalance added a hidden fourth chapter to NG+ that culminates in the secret boss Ouroboros, which is the hardest encounter in the game at launch and is the gating fight for the third ending.
NG+ Boss Tier Adjustments
| Boss | NG+ Change | New Weakness | Recommended Carry-Over |
|---|---|---|---|
| Beast King | +30% HP, gains Wind immunity in Phase 1 | Fire only | Earth-buffer for defense up |
| Mythos Leviathan | Rotates weaknesses every 60s instead of 90s | Water / Fire | Dual-element DPS pair |
| Ogre Warlord | Permanent enrage, no enrage timer removal | Earth | Single-target burst DPS |
| Ouroboros | All elements neutral, weapon-type damage doubled | Slash + Pierce | Physical-only party |
Ouroboros is the encounter that the exp farm boss list tips indirectly by sorting out which non-story bosses are the best practice targets for the physical-damage composition the secret boss demands. The recommended farm is the Ogre Warlord rematch, because it shares Ouroboros's single-target burst pattern and rewards the same Slash and Pierce gear you will need for the real fight.
Secret Boss Strategy: Ouroboros
The encounter is intentionally unfair if you walk in unprepared. The boss has no elemental weakness, so your only damage scaling comes from weapon-type matchup, debuff extensions, and the Another Force gauge. The community-reported clear times range from 7 minutes (optimized physical-only party) to 18 minutes (mixed party catching neutral-element ticks).
| Phase | HP Threshold | Major Mechanic | Counter-Pick |
|---|---|---|---|
| Phase 1 | 100% to 70% | Reflects all debuffs for 3s | Wait 3s before applying Slow or Burn |
| Phase 2 | 70% to 40% | Summons 3 echo adds | Focus echo adds with AoE slash |
| Phase 3 | 40% to 10% | Damage shield, -50% incoming | Dump AF gauge to break shield |
| Phase 4 | 10% to 0% | One-shot party if any member is debuffed | Pre-cleanse before entering Phase 4 |
The Phase 4 rule is the easiest to miss. Ouroboros will instant-kill any party member that is currently afflicted with Burn, Slow, Blind, Poison, Stun, or Confusion when the phase transition triggers, so the final 10% must be a debuff-free burn. Save your last cleanser for the phase transition, and do not apply Burn to push the last 10% even if the boss is technically weak to it during the 40% to 10% window. Clean debuffs on the phase change are worth more than the burst you would have gained from the Burn ticks.
Frequently Asked Questions
What are the most important Another Eden Begins boss weaknesses to remember?
The three highest-impact matchups are Fire-weak for the Beast King, Earth + Light for the Yaksha Overlord, and Light + Earth for the Mythos Core. These three bosses gate the main endings, and bringing the right elemental DPS for each encounter is the difference between a one-cycle clear and a multi-attempt grind.
Where can I find the secret boss in Another Eden Begins?
The secret boss Ouroboros is unlocked by completing the NG+ chapter 4, which is itself gated behind the third ending from the main story. After clearing Mythos Core: Zero, return to the title screen and accept the new NG+ prompt; the fourth chapter opens in the Ogre Wars overworld, and Ouroboros awaits at the end of the dungeon.
Do debuffs carry over into New Game+ boss fights?
Yes, debuffs carry over but with one critical exception. In NG+, the Ogre Warlord and Ouroboros both apply a debuff immunity shield for the first 3 seconds of any phase transition, so apply your debuffs only after the 3-second window opens. Burn and Slow are still the highest-impact debuffs, and they stack with the same multipliers as the main story.
How should I build my party for the final boss strategy?
The recommended final boss party is one Light-element healer, one Earth-element support, one Light-element or Earth-element DPS, and one flex slot that matches the Phase 1 weakness. Bring the Chrono Pearl accessory to break out of the Phase 2 Chrono Seal, and pre-apply Slow before the seal window so the boss's cast time is extended even if you cannot cleanse the stun.
What is the easiest way to practice hard boss strategies?
The Mirage rematch fights in chapter 3 are the best practice arena, because they share the elemental weakness and debuff profile of every main story boss but reset on a fast timer. Farming the Mirage fights also drops the element-tipped weapons needed for the final boss, so the practice loop feeds directly into your Mythos Core: Zero setup.